

Play Ragdoll Archers
Play Ragdoll Archers online and test your aim in this hilarious physics-based archery battle game. Shoot arrows, defeat opponents, and survive intense combats!
What Is Ragdoll Archers?
Ragdoll Archers is a physics-based stickman archery game where every shot is influenced by ragdoll movement, gravity, and momentum. Instead of rigid animations, your archer wobbles, bends, and reacts dynamically to each action, making every duel unpredictable. The goal is simple on the surface: shoot enemy archers before they shoot you. But the deeper strategy lies in how you manage stamina, aim under pressure, and invest your upgrades.
The core gameplay loop is addictive and straightforward: shoot enemies → earn skulls → upgrade your stats → unlock new arrows → survive longer against tougher waves. As you progress, enemies gain armor, better positioning, and increased pressure, forcing you to refine both aim and strategy.
Ragdoll Archers is playable directly in your browser using WebGL/HTML5 technology, meaning no downloads are required. It’s also available on Android for mobile players. Whether you want a quick casual session, intense local PvP battles, or cooperative survival with a friend on the same keyboard, the game supports multiple play styles.
It’s ideal for casual players who enjoy chaotic physics fun, competitive players who value precision headshots, and friends looking for a fast-paced 2-player archery challenge.
Why It Feels Different from Other Archery Games
Most archery games rely on clean, predictable animations. Ragdoll Archers replaces that with floppy physics and momentum-based movement. Your character doesn’t just stand and shoot, it sways, tilts, and reacts to impact. That means aiming isn’t only about direction; it’s about timing and stability.
The stamina system adds another layer. Holding your shot longer increases power, but it drains energy. Overcommit, and you’ll be too exhausted to defend yourself. Undercharge, and your arrow won’t finish the job.
This balance between ragdoll chaos and stamina discipline creates a unique blend of skill and unpredictability. Success isn’t just about aiming well, it’s about making smart decisions on upgrades, arrow choices, and shot timing under pressure.
How to Play Ragdoll Archers
At its core, Ragdoll Archers revolves around mastering three actions: aim, draw, and release. You click (or press the aim control), hold to pull back the bowstring, and release to fire. The longer you hold, the more powerful the shot. However, power comes at a cost, stamina drains while you charge. Managing that tradeoff is the foundation of survival.
A fully charged arrow can secure instant headshots or break through tougher enemies, but if you empty your stamina bar, you leave yourself vulnerable. In most situations, a controlled mid-power shot is more efficient than constant full draws.
Positioning matters just as much as aim. Stay balanced on platforms and avoid reckless jumps. Jumping can help dodge incoming arrows or reposition for a better angle, but unnecessary movement destabilizes your ragdoll and wastes stamina. Controlled movement beats panic reactions.
Runs typically end in three ways:
- Your HP reaches zero after repeated hits.
- You fall off the platform due to poor balance or knockback.
- You drain stamina at the wrong moment and can’t defend yourself.
As enemies scale in difficulty, smart stamina use and careful positioning become more important than raw aggression.
The Core Loop in 30 Seconds
Each session follows a simple but escalating rhythm. You face waves of enemy archers and try to eliminate them efficiently. Defeated enemies reward you with skulls, which act as upgrade currency.
During battles, floating apples restore health and stamina, extending your run if collected strategically. Between fights or upgrades, you invest skulls into stats like health, stamina, damage, or arrow capacity.
The longer you survive, the tougher the enemies become, including heavily armored opponents and occasional boss-style giants. The loop is clear: survive waves, collect apples, earn skulls, upgrade wisely, and push your run further each time.
Controls by Mode (Desktop + Mobile)
Ragdoll Archers keeps its control system simple, but mastering it takes precision. On desktop, aiming and shooting are handled primarily with the mouse, while jumping is controlled via the keyboard. The key difference between modes lies in how movement and aiming are assigned when two players share the same device.
In single-player mode, you control everything with the mouse and a jump key. In multiplayer modes (PvP and 2-player co-op), the keyboard is split between two players to allow competitive or cooperative play on the same screen.
On mobile or tablet devices, the game runs through HTML5/WebGL in your browser. Instead of clicking and dragging with a mouse, you tap, hold, and drag to aim. Releasing your finger fires the arrow. Jumping is typically mapped to an on-screen control or gesture, depending on the platform interface.
|
Mode |
Aim & Shoot |
Jump |
|
1 Player (Desktop) |
Hold & release left mouse button |
Spacebar |
|
PvP – Player 1 |
WASD (aim control) |
Left Shift |
|
PvP – Player 2 |
Arrow keys (aim control) |
Right Shift |
|
2 Player Co-op |
Same as PvP |
Same as PvP |
|
Mobile |
Tap, drag, release |
On-screen control |
1 Player Controls
In single-player mode, controls are streamlined for accuracy and fluid shooting. You use the left mouse button to aim and shoot. Click and hold to draw the bowstring, adjust your aim by moving the mouse, and release to fire. The longer you hold, the stronger the shot, but remember, stamina drains while charging.
Press the Spacebar to jump. Jumping helps you dodge incoming arrows or reposition for better angles, but excessive jumping wastes stamina and destabilizes your ragdoll archer. Controlled movement combined with disciplined shot timing is the key to longer runs in solo mode.
PvP Controls
PvP mode splits the keyboard between two players for local competitive play.
Player 1 (left side of the screen):
- Use W, A, S, D to aim and control shooting direction.
- Press Left Shift to jump.
Player 2 (right side of the screen):
- Use the Arrow Keys to aim and control shooting direction.
- Press Right Shift to jump.
Unlike mouse aiming, PvP requires more deliberate directional input. This makes stamina timing, positioning, and headshot precision even more important. Quick reactions and controlled stamina use often decide matches in just a few shots.
2 Player Co-op Controls
Two-player co-op uses the same keyboard layout as PvP mode.
Player 1 uses WASD + Left Shift, while Player 2 uses Arrow Keys + Right Shift.
The difference is strategic rather than mechanical. Instead of fighting each other, both players team up against AI enemies. Coordinated positioning, staggered shots, and shared stamina awareness become crucial for survival.
Game Modes (Pick the Right Mode for Your Goal)
Ragdoll Archers offers three main modes, each encouraging a different playstyle and skill focus. Choosing the right mode depends on whether you want to practice, farm upgrades, compete, or cooperate.
Single-Player Mode is the best starting point for most players. You face AI-controlled enemies in escalating waves. This mode is ideal for farming skulls, learning headshot timing, and understanding stamina management without the pressure of another human opponent. If your goal is progression and unlocking new arrows, solo mode provides the most consistent improvement path.
2-Player Co-op Mode shifts the focus from individual precision to teamwork. Two players share the keyboard and fight waves together. One player can adopt a defensive style, focusing on survival and apple recovery, while the other prioritizes damage and enemy elimination. Coordination extends runs significantly compared to solo play.
PvP Mode is where mechanics are tested under pressure. Matches are fast and often decided by headshots or stamina mismanagement. Because both players have similar tools, victory comes from timing, angle control, and baiting stamina drains. PvP rewards aggressive precision and mental composure.
Each mode reinforces different skills:
- Solo builds consistency.
- Co-op builds coordination.
- PvP builds reaction speed and stamina mind-games.
Best Mode for Beginners vs Competitive Players
If you’re new, start with Single-Player Mode. It allows you to learn aiming physics, stamina pacing, and apple prioritization without immediate elimination from a skilled opponent. It’s also the safest way to earn skulls for upgrades.
If you’re playing casually with a friend, 2-Player Co-op offers the most forgiving and entertaining experience. You can cover each other’s mistakes and experiment with strategies.
For experienced players seeking a challenge, PvP Mode is the most skill-dependent. Headshots matter more, stamina misplays are punished instantly, and psychological pressure increases the difficulty. Competitive players should focus on PvP to sharpen precision and reaction timing.
Choosing the right mode isn’t just about preference, it shapes how quickly you improve and how effectively you unlock advanced arrows and upgrades.
HP & Stamina System (How You Actually Lose Runs)
In Ragdoll Archers, survival is controlled by two resources: HP (health) and stamina. HP determines how much damage you can take before your run ends. Stamina determines how often and how effectively you can act. If HP is your survivability meter, stamina is your action budget.
You lose HP when enemy arrows connect with your body. Headshots and fully charged enemy shots typically deal significantly more damage. Fall damage or explosive hazards can also drain HP quickly. Once HP reaches zero, the run ends immediately.
Stamina, however, is the hidden limiter that ends more runs than players realize. Every time you:
- Hold a shot too long
- Fire multiple arrows rapidly
- Jump excessively
- Chain actions without pause
…you drain stamina. When the stamina bar empties, you cannot shoot effectively or reposition quickly. That leaves you exposed to incoming arrows and unable to finish enemies.
One of the biggest beginner mistakes is overcharging every shot. A full-draw arrow feels powerful, but it drains stamina fast. If the shot misses or fails to kill, you’ve spent most of your action budget for minimal gain. Meanwhile, enemies can fire freely.
Stamina naturally regenerates over time, but only if you stop acting. The more controlled your pacing, the more sustainable your run becomes. Efficient players don’t just aim better, they manage stamina like a limited resource, pacing shots and jumps to maintain control of the battlefield.
Stamina Efficiency Model (Simple, Usable Rule)
Think of stamina management in three tiers:
- Full draw only when you need maximum range or armor break.
- Mid-draw for most standard engagements.
- Never empty the bar unless it guarantees a kill.
Full draws are situational tools, not default behavior. Most enemies can be eliminated with controlled mid-power shots, especially if you aim for the head. Mid-draw shots cost less stamina, allow faster recovery, and keep you reactive.
Emptying your stamina bar is dangerous unless you are certain the shot will eliminate a high-threat enemy. A missed full-draw leaves you defenseless for several seconds, often long enough to take fatal damage.
Below is a compact decision grid you can use mid-fight:
|
Distance |
Enemy Threat |
Recommended Draw Length |
|
Close |
Low |
Light to mid draw |
|
Close |
High |
Mid draw (aim head) |
|
Medium |
Low |
Mid draw |
|
Medium |
High |
Mid to full draw |
|
Far |
Low |
Mid draw (adjust angle) |
|
Far |
High |
Full draw (controlled) |
High threat = armored enemy, boss, or multiple archers targeting you.
Low threat = isolated, lightly armored enemy.
This grid prevents stamina waste while preserving killing power. Efficiency wins longer runs.
Apples & Recovery System (Heal Smarter, Not Harder)
Apples are your primary recovery tool during combat. They float across the battlefield and restore different resources when hit with an arrow. While exact values may vary, the types typically include:
- Red apple – restores health (HP)
- Green apple – restores stamina
- Golden or combined apple – restores both HP and stamina
- Occasionally enhanced apples may provide larger bonuses or extra survivability
Apples are essential, but chasing them recklessly is one of the fastest ways to die. As difficulty scales, enemies become more aggressive and accurate. Exposing yourself just to grab a small health boost can cost more HP than you recover.
Early in a run, apples are forgiving tools for recovery. Later, they become strategic decisions. The higher the difficulty, the more disciplined your apple targeting must be. Sometimes the safest move is eliminating threats first, then collecting recovery safely.
The key is understanding that apples are not bonuses, they are risk-reward triggers. You should only pursue them when the recovery outweighs the exposure.
Apple Targeting Priority Framework
Apple priority should depend entirely on your current resource pressure.
- If HP is critically low: prioritize red or combined apples immediately.
- If stamina is depleted: prioritize green apples to restore your ability to fight.
- If both are pressured: combined apples become highest value.
- If both are stable: ignore apples until the field is safer.
Before going for any apple, run this quick checklist:
Do I go for the apple?
- Is there an enemy currently aiming at me?
- Will I need to full-draw to hit it?
- Am I exposing myself to multiple angles?
- Can I eliminate one threat first?
- Will the recovery meaningfully extend my survival?
If the answer suggests high exposure with low gain, skip it. Smart players treat apples as controlled recovery windows, not panic buttons.
Upgrade System (Skulls) + What to Upgrade First
Skulls are the core progression currency in Ragdoll Archers. You earn them by defeating enemies, surviving longer waves, and taking down tougher opponents like armored units or giant mini-bosses. The stronger the enemy, the greater the skull reward. Skulls allow you to upgrade your archer’s core stats and unlock new arrow slots, directly influencing how long you can survive and how efficiently you eliminate threats.
Most upgrade systems in the game revolve around categories such as:
- Health (HP / Blood): Increases how much damage you can take before dying.
- Stamina: Expands your action budget and lets you shoot or jump more frequently.
- Stamina Regeneration: Improves how quickly your stamina refills between actions.
- Damage / Power / Pull Strength: Increases arrow lethality.
- Lives (if available): Adds extra survivability buffers.
- Arrow Slots: Allows you to equip multiple arrow types at once for tactical flexibility.
The most common beginner mistake is upgrading damage too early. While stronger shots feel satisfying, they do not compensate for poor stamina management or low survivability. If you can’t survive long enough to fire consistently, extra damage has little value.
Early runs are usually lost because players:
- Run out of stamina
- Get overwhelmed by multiple enemies
- Take one or two lethal hits due to low HP
Damage upgrades help finish enemies faster, but survivability upgrades help you stay in the fight longer, and longer fights generate more skulls. Sustainable growth almost always outperforms burst damage stacking in early progression.
To maximize long-term performance, upgrades should match your failure pattern, not your ego. That’s where a decision framework becomes critical.
Upgrade Priority Framework (Decision Tree)
Instead of upgrading randomly, use this mid-run decision tree based on how you’re actually losing.
If you die quickly from a few hits:
Prioritize Health, Armor, or Extra Lives.
You’re not surviving long enough to capitalize on damage upgrades. Increasing HP gives you more margin for error and reduces the impact of single mistakes.
If enemies survive your shots and overwhelm you:
Prioritize Damage, Pull Strength, or Power-related upgrades.
If you’re landing hits but not finishing opponents fast enough, increasing lethality improves tempo and reduces incoming pressure.
If you constantly run out of stamina:
Prioritize Stamina Capacity and Stamina Regeneration.
Empty stamina equals zero offense and weak defense. If you feel “stuck” after shooting, this is your bottleneck.
If you lose control during multi-enemy waves:
Prioritize Arrow Slots.
More arrow types allow you to adapt. Utility arrows, control effects, or heavier damage types can stabilize chaotic fights. Flexibility increases strategic depth.
If bosses feel overwhelming:
Balance survivability and damage scaling instead of committing fully to one. Boss fights punish extreme specialization.
The key principle:
Upgrade the stat that addresses your most common failure, not the stat that feels powerful.
Upgrading based on performance data (how you actually died) turns the system into a structured optimization path rather than guesswork.
Upgrade Priority Table (Fast Reference)
Use this phase-based table to guide your decisions as you progress:
|
Phase |
Priority Focus |
Why It Matters |
|
Early Game |
Health + Stamina Stability |
Survive longer, reduce early deaths, build consistency |
|
Early-Mid |
Stamina Regen + Controlled Damage |
Sustain pressure without exhaustion |
|
Mid Game |
Damage + Arrow Slots |
Improve tempo and adaptability |
|
Late Game |
Specialized Scaling (Boss handling, precision builds) |
Optimize consistency and advanced encounters |
Early Game:
Focus on survivability and stamina. You’re still learning positioning and shot pacing.
Mid Game:
Add damage and arrow flexibility. At this point, consistency improves and efficiency matters more.
Late Game:
Fine-tune your build to handle bosses, armored enemies, and high-pressure waves. This is where strategic specialization becomes viable.
By combining the decision tree with this phase table, you transform upgrades from random investments into a deliberate performance strategy, dramatically increasing long-term survival potential.
Progression Roadmap (From First Run to “I Can Survive Forever”)
Progress in Ragdoll Archers isn’t just about unlocking stronger arrows, it’s about building consistency. The real sign of improvement is surviving longer without panic, managing stamina without draining it, and making upgrade decisions based on performance rather than impulse.
Early players often measure progress by damage numbers. Advanced players measure it by control: fewer wasted shots, smarter apple timing, and efficient stamina recovery. Over time, you’ll notice three clear progression phases: early, mid, and late.
Early Game (Foundation Phase)
This stage is about stability. You’re learning enemy patterns, adjusting to ragdoll physics, and developing aim discipline. Most deaths happen due to stamina mismanagement or poor positioning.
Focus on:
- Health and stamina upgrades
- Mid-draw shot discipline
- Eliminating single threats before chasing apples
- Building consistent headshot timing
The goal isn’t flashy kills, it’s reducing unforced mistakes.
Mid Game (Optimization Phase)
Here, you start unlocking more arrow types and facing tougher enemies. You can survive basic waves reliably, but chaos increases when multiple enemies pressure you.
Focus on:
- Balanced upgrades (damage + stamina regen)
- Expanding arrow slots for flexibility
- Using specialized arrows strategically
- Controlling tempo rather than reacting
Mid game is where efficiency becomes more important than raw defense. You’re no longer just surviving, you’re optimizing.
Late Game (Scaling & Mastery Phase)
Late game begins when survival feels sustainable and boss encounters become the main challenge. Your build is more defined, and your stamina control is deliberate.
Focus on:
- Specialized upgrades for boss handling
- Arrow combinations for control and burst
- High-percentage headshots
- Minimal stamina waste
At this stage, improvement comes from refining small decisions, shaving off stamina waste, improving angle precision, and reducing exposure during apple grabs.
Below is a simplified roadmap reference:
|
Phase |
Skill Focus |
Upgrade Focus |
Arrow Focus |
|
Early |
Aim control + stamina pacing |
Health + stamina stability |
Basic reliability |
|
Mid |
Tempo management + positioning |
Damage + regen + slots |
Utility + adaptability |
|
Late |
Precision + risk control |
Specialized scaling |
Boss-ready loadouts |
Progress isn’t linear. It’s a cycle of stabilizing, optimizing, and refining until survival becomes sustainable rather than accidental.
Fastest Way to Earn Skulls (Without Dying)
The fastest way to earn skulls is not reckless aggression, it’s controlled efficiency. Long runs generate more skulls than short, high-risk bursts.
Follow these safer play principles:
Steady headshots over spam shooting.
Accurate mid-draw headshots eliminate enemies efficiently without draining stamina.
Never empty stamina unless securing a kill.
A missed full-draw shot costs tempo and exposes you to damage.
Clear threats before chasing apples.
Apples extend runs, but chasing them while under pressure often leads to unnecessary HP loss.
Eliminate high-threat enemies first.
Armored or aggressive archers should be prioritized to reduce incoming damage.
Stay grounded unless repositioning is necessary.
Unnecessary jumping destabilizes aim and wastes stamina.
The secret to earning skulls quickly is consistency. Survive longer, make fewer mistakes, and build controlled momentum, skull income naturally scales with survival time.
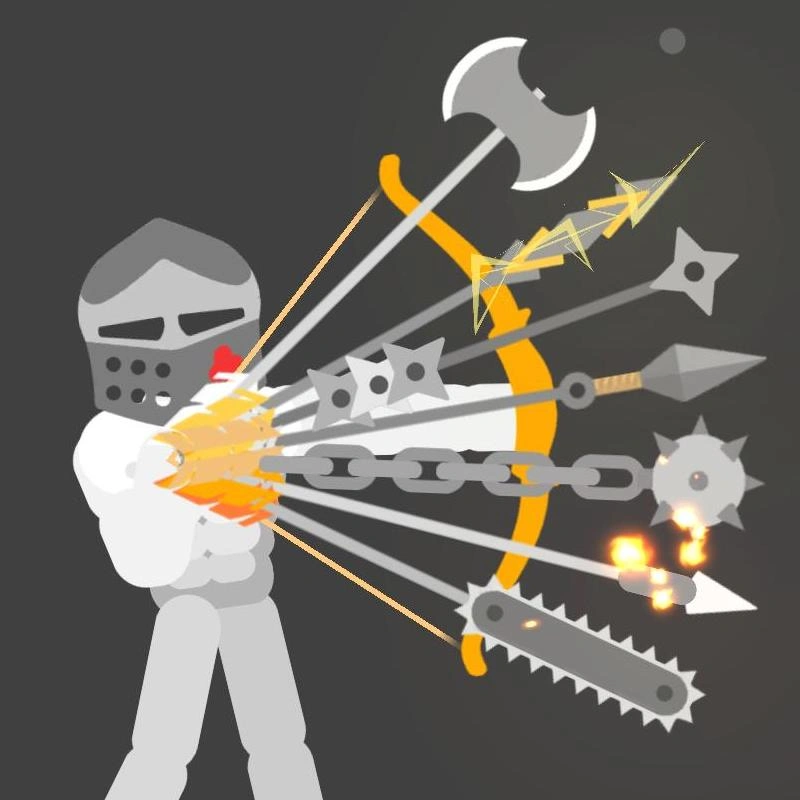
Arrow Type Comparison Matrix + Best Arrow Loadouts
Arrows are not just cosmetic upgrades in Ragdoll Archers, they fundamentally change how you approach combat. While base arrows reward precision and clean headshots, special arrows introduce new layers of utility, burst damage, or battlefield control. The key is understanding that arrows fall into roles, not just power levels.
You should think about arrows in four functional categories:
- Finisher: High-damage arrows designed to secure kills quickly.
- Crowd Control: Arrows that disrupt enemy positioning or create space.
- Armor Break: Heavier or high-force arrows suited for tougher opponents.
- Control/Utility: Arrows that manipulate movement, knock enemies off platforms, or create tactical advantages.
Choosing arrows randomly limits your adaptability. Choosing arrows by role creates strategic flexibility. A balanced loadout often performs better than stacking only high-damage options.
Arrows also come with tradeoffs. Some may consume more stamina, travel differently, or carry self-damage risk if used recklessly. A powerful arrow that drains stamina too quickly can shorten runs rather than extend them.
The goal isn’t to equip the “strongest” arrow, it’s to equip the right combination for your mode and objective.
Arrow Type Comparison Matrix (Core Table)
Below is a structured comparison framework. Exact arrow availability may vary depending on progression, but this matrix helps you evaluate them strategically.
|
Arrow Type |
Primary Use Case |
Best Mode |
Strengths |
Risks / Tradeoffs |
When to Equip |
|
Basic Arrow |
Precision headshots |
Solo / PvP |
Low stamina cost, reliable |
Lower burst damage |
Default early-game reliability |
|
Multi-Shot (3-shot) |
Pressure & hit chance |
PvP / Solo |
Higher hit probability |
More stamina use |
Against agile enemies |
|
Heavy / Iron Arrow |
Armor break |
Solo / Boss |
Strong impact, high damage |
Slower recovery |
Armored or tanky enemies |
|
Electric / Elemental |
Burst + effect |
Solo / PvP |
Extra damage potential |
May drain stamina faster |
High-threat targets |
|
Poison Arrow |
Damage over time |
Solo |
Sustained pressure |
Slower immediate kill |
Longer fights |
|
Balloon / Knockback |
Crowd control |
Co-op / Solo |
Disrupt positioning |
Low direct damage |
Edge control / spacing |
|
Axe / Specialty Arrow |
High burst |
Boss / PvP |
Heavy impact |
High stamina cost |
Finishing critical targets |
Key evaluation rule:
If an arrow increases kill speed without destabilizing stamina management, it’s efficient. If it adds chaos without control, it’s situational.
The best loadouts combine at least:
- One reliable low-cost option
- One burst/armor breaker
- One utility/control arrow (if slots allow)
Best Arrow Loadouts by Mode
Your loadout should reflect your objective.
Beginner Loadout (Simple + Safe)
- Basic Arrow (low stamina reliability)
- Mid-damage or Multi-shot Arrow
- Optional light utility arrow (if unlocked)
This setup reduces stamina drain and supports headshot practice. It’s ideal for learning timing and improving consistency.
Boss Loadout (Burst + Control)
- Heavy / Armor-breaking Arrow
- High-damage specialty arrow
- Utility/control arrow for positioning
Boss fights demand controlled burst damage. You need enough power to break defenses while maintaining enough stamina to survive extended exchanges.
PvP Loadout (Fast Pressure + Precision)
- Basic Arrow (fast, efficient shots)
- Multi-shot arrow (pressure tool)
- High-burst arrow (finisher)
PvP rewards tempo. You want fast recovery shots and a reliable finisher for headshot opportunities. Overly stamina-heavy arrows can backfire under pressure.
Co-op Loadout (Role Split Strategy)
In co-op, split responsibilities:
Player 1 (Damage Focus):
- High-damage arrow
- Armor breaker
- Finisher
Player 2 (Control & Support):
- Utility/control arrow
- Balanced mid-damage arrow
- Reliability option
This role division stabilizes chaotic waves. One player applies pressure, while the other manages spacing and safety.
The most effective players don’t chase the strongest arrow, they build loadouts that solve problems. When arrows serve defined roles, your survivability and tempo both improve dramatically.
Best Tips for Beginners (High Impact, Low Complexity)
If you’re new to Ragdoll Archers, improvement doesn’t come from playing faster, it comes from playing smarter. Most early deaths aren’t caused by weak upgrades; they’re caused by small, repeatable mistakes. Fix those first, and your runs will immediately last longer.
1. Headshots Matter, But Don’t Tunnel Vision
Headshots deal significantly more damage and can end fights instantly. However, forcing every shot toward the head often leads to overcharging, poor angles, and missed arrows. If a clean body shot secures a safe elimination, take it. Prioritize high-percentage shots over flashy shots.
Think efficiency, not perfection.
2. Stop Overcharging Every Shot
Full-draw shots drain stamina rapidly. If the enemy doesn’t require maximum force, use a controlled mid-draw instead. Overcharging creates long recovery windows where you can’t defend yourself.
A good rule:
If the enemy is already within medium range, you probably don’t need full power.
3. Jump With Purpose, Not Panic
Jumping changes your hitbox and can dodge incoming arrows, but random jumping wastes stamina and destabilizes your aim. Panic jumping often leads to falling off platforms or mistimed shots.
Only jump when:
- Avoiding a confirmed incoming arrow
- Repositioning for angle advantage
- Escaping edge pressure
Grounded stability wins more fights than frantic movement.
4. Use Apples at the Right Moments
Apples restore health or stamina, but chasing them under pressure often leads to taking more damage than you recover. Clear immediate threats before aiming for recovery.
The safest apple is the one you collect after reducing enemy pressure.
5. Win by Consistency, Not Aggression
Long survival comes from discipline:
- Controlled shot pacing
- Smart stamina conservation
- Safe positioning
- Selective aggression
You don’t need highlight plays. You need repeatable performance. When your stamina never hits zero and your positioning remains stable, enemies eventually make mistakes, not you.
Beginner vs Advanced Strategy Comparison
The biggest difference between beginners and advanced players isn’t reaction speed, it’s resource discipline and positioning control.
|
Category |
Beginner Approach |
Advanced Approach |
|
Aiming Style |
Always full-draw for max damage |
Controlled mid-draw, situational full-draw |
|
Stamina Usage |
Drains bar frequently |
Maintains reserve buffer |
|
Upgrade Choices |
Prioritizes damage early |
Prioritizes survivability + stamina first |
|
Apple Behavior |
Chases apples immediately |
Secures field, then recovers |
|
Arrow Selection |
Equips strongest-looking arrow |
Builds role-based loadout |
|
Positioning |
Reactive and jump-heavy |
Stable, grounded, angle-controlled |
Advanced players don’t necessarily shoot better, they waste less.
Survival Checklist (Printable)
Before and during each wave, run through this quick checklist:
- Is my stamina above 50% before engaging?
- Am I using mid-draw instead of full-draw by default?
- Is there a high-threat enemy I should eliminate first?
- Am I jumping only when necessary?
- Can I secure a headshot without overexposing myself?
- Is chasing this apple worth the risk?
- Do I have at least one reliable arrow equipped?
- Am I maintaining stable ground positioning?
- Did I avoid emptying my stamina bar?
Consistency across these small decisions is what turns short runs into long streaks.
Boss Fight Strategy Template (Giants / Mini-bosses)
Boss encounters in Ragdoll Archers change the pacing completely. Unlike standard enemies, bosses (including giant mini-bosses) typically have:
- Larger HP pools
- Stronger armor or resistance
- Higher knockback force
- Longer time-to-kill
- Greater stamina pressure
Regular waves reward speed and efficiency. Boss fights reward discipline and stamina control. If you approach bosses the same way you handle normal enemies, spamming full-draw shots and chasing quick kills, you’ll likely exhaust yourself before the boss goes down.
What Changes in Boss Fights
- Time-to-Kill Increases
Bosses require sustained damage. This shifts the focus from burst aggression to controlled stamina pacing.
- Armor & Damage Resistance
Heavier arrows or armor-breaking options become more valuable. Basic arrows may still work, but fights last longer.
- Knockback & Position Risk
Boss hits often push your ragdoll harder. Poor positioning near platform edges becomes lethal.
- Stamina Management Becomes Critical
You cannot afford repeated full-draw spam. Running out of stamina against a boss is often fatal.
Positioning Principles for Boss Fights
- Stay slightly off-center to avoid edge knockback.
- Avoid jumping unless dodging a confirmed incoming shot.
- Reset stamina before re-engaging.
- Prioritize stable footing over aggressive pursuit.
- Clear minor enemies first if present.
Boss fights are wars of attrition. If your stamina bar is constantly near zero, you’re playing too aggressively.
Arrow Choice Logic for Bosses
Your loadout should support sustained pressure and controlled burst:
- One armor-breaking or heavy arrow for meaningful damage.
- One reliable low-stamina arrow for pacing.
- Optional control arrow if the boss movement is chaotic.
Avoid equipping only stamina-heavy arrows. Boss fights demand endurance.
Boss Tactical Blueprint (Copy/Paste Template)
Use this template before engaging any boss encounter:
- Threat Type
- Armor-heavy
- High ranged pressure
- High knockback
- Multi-enemy support
- Recommended Upgrades
- Prioritize: Health / Stamina stability
- Add: Damage scaling (if survivability is stable)
- Avoid: Over-specializing in burst if stamina is weak
- Recommended Arrow Slots
- Slot 1: Reliable low-cost arrow
- Slot 2: Heavy / armor-breaking arrow
- Slot 3 (if available): Utility/control arrow
- Target Zones
- Head (if clear shot and safe stamina margin)
- Upper torso for consistent damage
- Avoid low-percentage angled shots
- “Do Not Do This” List
- Do not empty your stamina bar
- Do not fight near platform edges
- Do not chase apples while under pressure
- Do not spam full-draw shots
- Do not ignore minor enemies supporting the boss
The key principle of boss encounters:
Stamina control wins the fight.
If you maintain a stamina reserve and control your positioning, even high-HP giants become manageable over time.
Risk Mitigation Guide (Top Ways Runs End)
Most runs in Ragdoll Archers don’t end because enemies are “too strong.” They end because of preventable mistakes that compound under pressure. The better you understand common failure patterns, the longer your runs become, often without changing your upgrades at all.
Below are the seven most common ways players lose control of a run.
1. Stamina Hitting Zero
Running out of stamina removes your ability to shoot effectively or reposition. This usually happens after repeated full-draw shots or panic jumping. Once stamina is empty, you become a stationary target.
Fix: Maintain a stamina buffer. Never drop below 25–30% unless finishing a high-threat enemy.
2. Overcommitting Full-Draw Shots
Full-power shots feel strong, but missing one can cost most of your stamina bar. Against multiple enemies, this creates lethal vulnerability windows.
Fix: Default to mid-draw shots. Reserve full-draw for long-range or armored threats.
3. Greedy Apple Chasing
Apples restore HP or stamina, but chasing them while under enemy pressure often results in taking more damage than you recover.
Fix: Clear immediate threats first. Treat apples as recovery windows, not emergency panic buttons.
4. Poor Edge Positioning
Standing too close to platform edges increases the risk of knockback deaths. Bosses and heavy arrows amplify this risk.
Fix: Stay slightly off-center. Control the middle of the platform whenever possible.
5. Panic Jumping
Jumping repeatedly destabilizes your ragdoll and drains stamina. It also makes your aim inconsistent.
Fix: Jump only to dodge confirmed incoming shots or reposition deliberately.
6. Ignoring Explosives or Hazard Objects
Explosive objects and bombs can damage both enemies and you. Shooting them too close can result in self-damage or unintended knockback.
Fix: Only trigger explosives at safe distances and when enemies are closer than you.
7. Targeting the Wrong Enemy First
Focusing on low-threat enemies while high-damage archers line up shots increases incoming pressure and accelerates HP loss.
Fix: Identify and eliminate high-threat targets first, especially armored or aggressive opponents.
Long survival isn’t about being aggressive. It’s about minimizing avoidable risks. Once you eliminate these failure patterns, your runs naturally become longer and more stable.
If you fix even three of these consistently, your average run length will improve dramatically. Risk reduction is often more powerful than upgrading damage.
Similar Games Like Ragdoll Archers
If you enjoy the physics-driven chaos and competitive tension of Ragdoll Archers, there are several other games that deliver a similar mix of precision, unpredictability, and multiplayer fun. Here are strong recommendations grouped by vibe.
Ragdoll Chaos
Stickman Epic Battle
If you enjoy unpredictable physics and wild knockback effects, this delivers chaotic stickman combat with over-the-top reactions.
Ragdoll Hit
Focused on physics-based brawling, this game emphasizes timing and positioning, perfect if you love momentum-driven fights.
Happy Wheels
A classic physics chaos game where balance, movement, and absurd ragdoll reactions create hilarious (and brutal) outcomes.
Archery Duels & Precision Combat
Bowmasters
Fast-paced projectile duels with exaggerated physics and powerful special shots. Great if you enjoy headshot-focused battles.
Narrow One
A multiplayer archery game with more tactical positioning and team-based objectives.
Stickman Bow 3
A skill-based archery challenge with wave survival mechanics similar to solo mode.
2-Player Party Physics
Basket Random
Another physics-driven 2-player experience where timing and chaotic movement create unpredictable results.
Getaway Shootout
Momentum-based duels with simple controls and hilarious ragdoll motion.
Drunken Duel
A minimalist 2-player physics shooter where instability is the core mechanic.
If you love Ragdoll Archers for its blend of stamina management, headshot precision, and chaotic physics reactions, these games expand on similar ideas, whether you prefer competitive duels, co-op fun, or pure ragdoll madness.